Recording is available on software version vANTB1R_2.0.4 and later. If you are on an earlier version, please update first: How to update the system software.
Recording was previously available only on the beta update channel. From 2.0.4 it is part of the standard software, so you no longer need to be on beta to use it.
Here is how to use it.
TABLE OF CONTENTS
- External Storage
- Scheduled DVR Recordings
- Recording Settings
- Recording Indicators & Restrictions
- Managing Recorded Content
- Handling Recording Conflicts
- Searching for Recorded Content
- Manual Recording (When Program Guide Lacks Information)
External Storage
1. It is recommended to use an SSD (Solid State Drive). If using an HDD (Hard Disk Drive), external power is required.
2. Please ensure that the hard drive is formatted in FAT32 or exFAT.
3. Connect the hard drive to the ADTH box.
Note: There is no minimum space requirement for the external hard drive, but based on experience, a 60-minute 1080p recording requires 2.5GB of space. Please choose a hard drive size that suits your recording needs.
Scheduled DVR Recordings
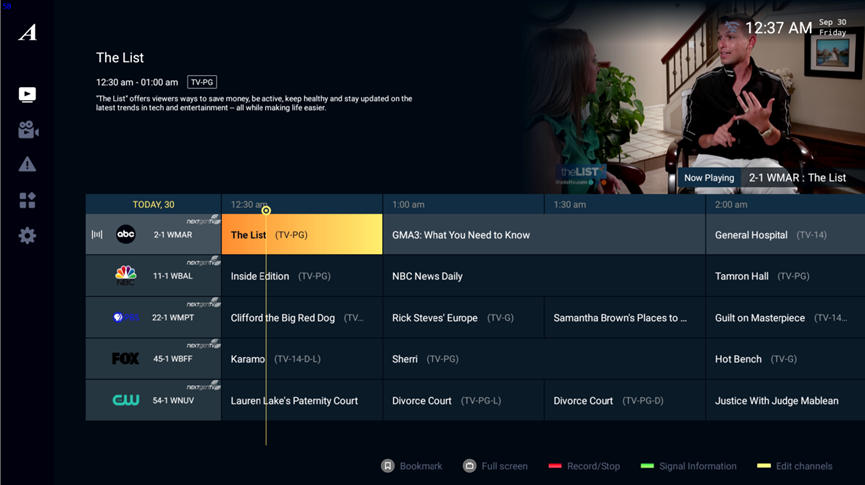
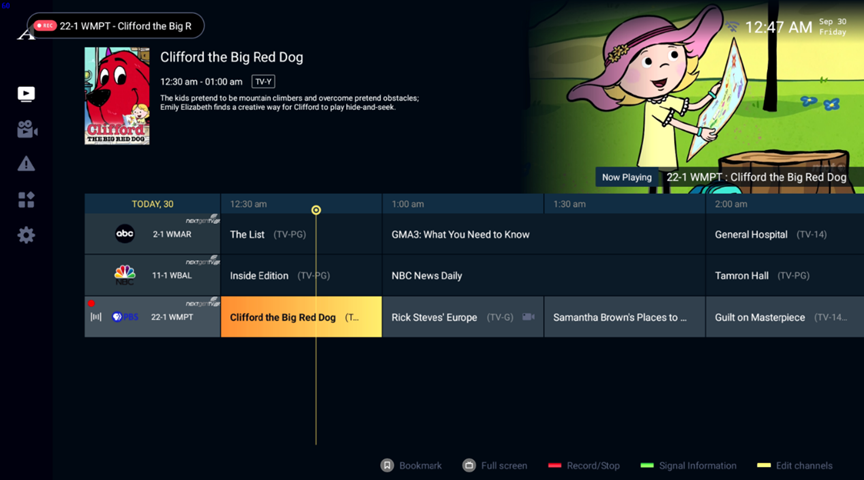
- Open the Program Guide.
- Select the program you want to record.
- Press the red color key on the remote control.
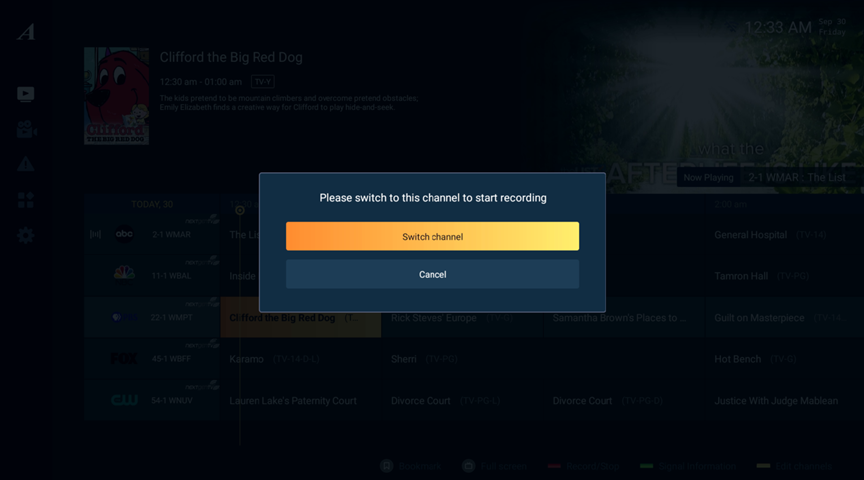
- If prompted, switch to the channel’s frequency to begin recording.
- You can also start recording while viewing in full-screen mode by pressing the red color key.
Recording Settings
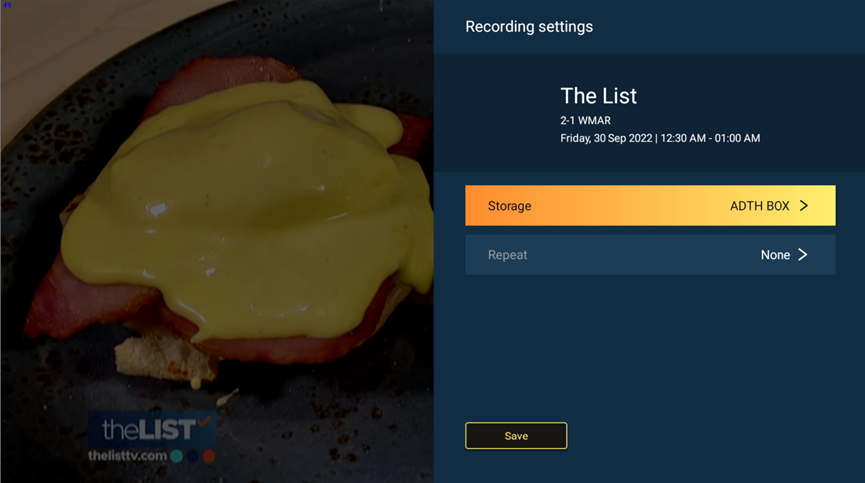
- Set up your preferred storage in Recording Settings before recording.
- Choose whether to sync future scheduled recordings.
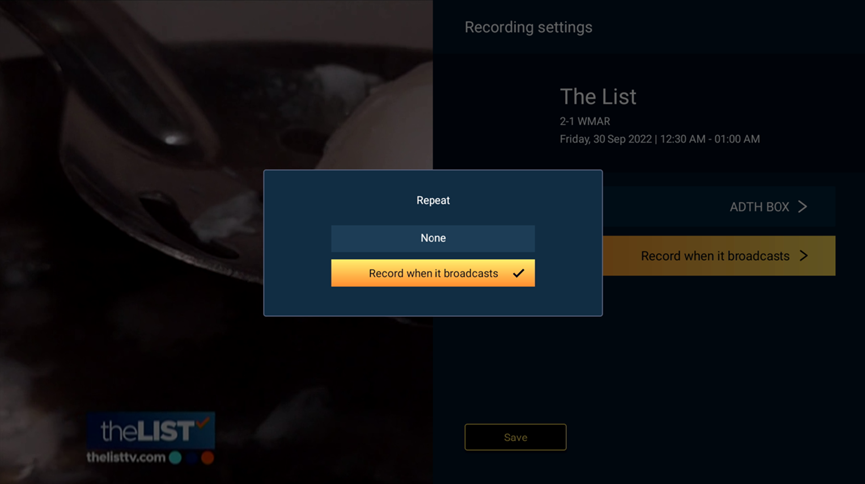
- Enable Record when it broadcasts to automatically record future episodes of the same program on the same channel.
Recording Indicators & Restrictions
- A red REC icon appears in the top-right corner when the recording is active.
- Channels on different frequencies will be hidden to prevent recording interruptions.
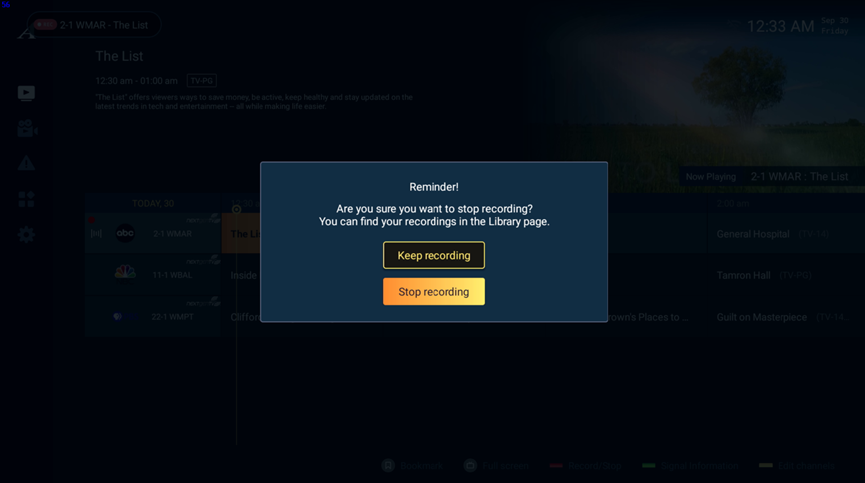
- To stop recording early, press the red color key again.
Managing Recorded Content
Playback
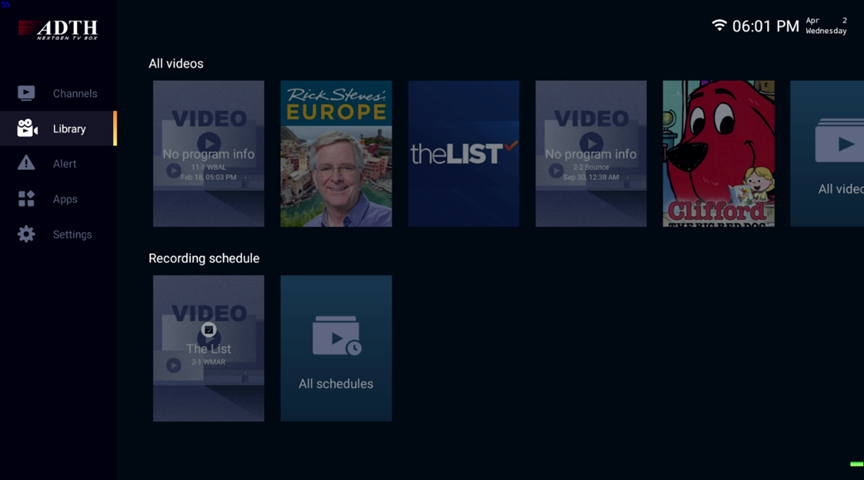
- Go to Library to view recorded and scheduled recordings.
- Select a recording to start playback.
- Use the OK button to pause/resume playback.
- Press left/right arrows to fast-forward or rewind, then press OK to resume.


Deleting Recordings
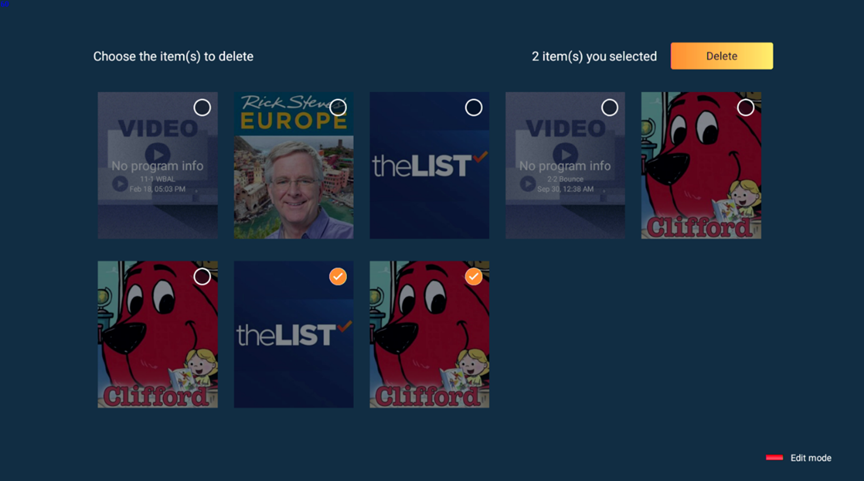
- Open Library > All Videos.
- Press the red color key to enter Edit Mode.
- Select the video(s) to delete.
- Confirm by pressing Delete.
Handling Recording Conflicts
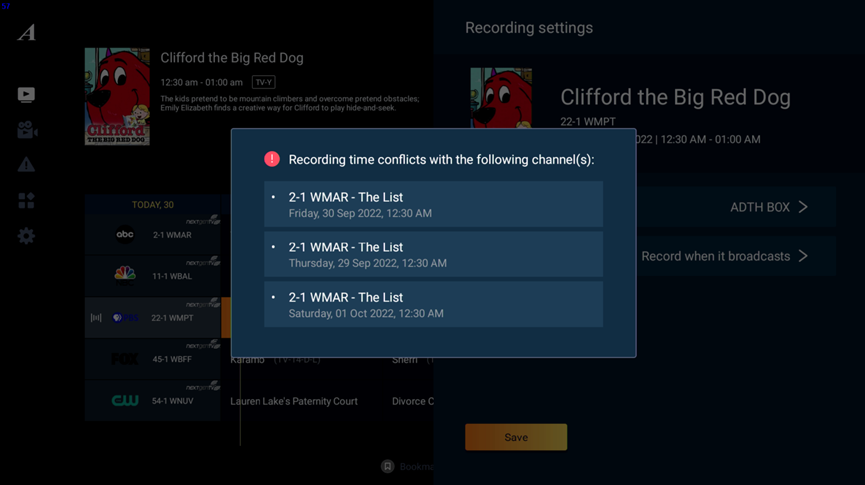
- Only one program can be recorded at a time.
- If a conflict occurs, a notification will prompt you to cancel an existing recording.
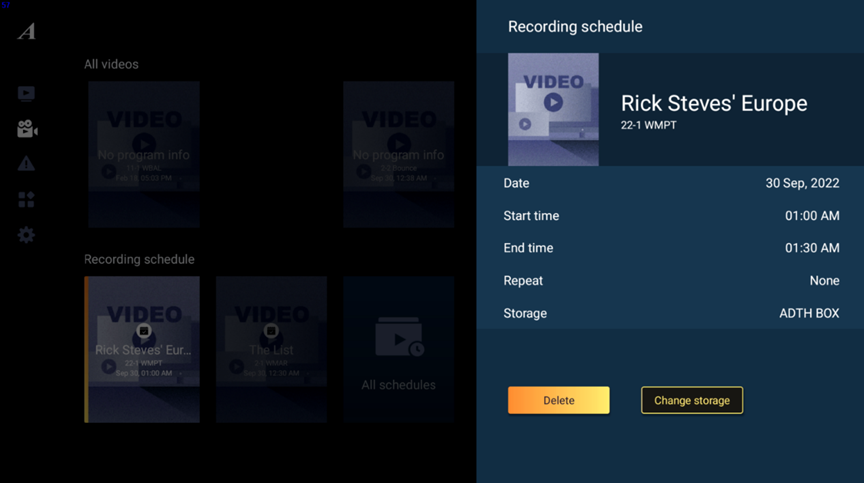
- To remove a scheduled recording:
- Open Library.
- Select the scheduled recording.
- Choose Delete.
- You can also change the storage location from this menu.
Searching for Recorded Content
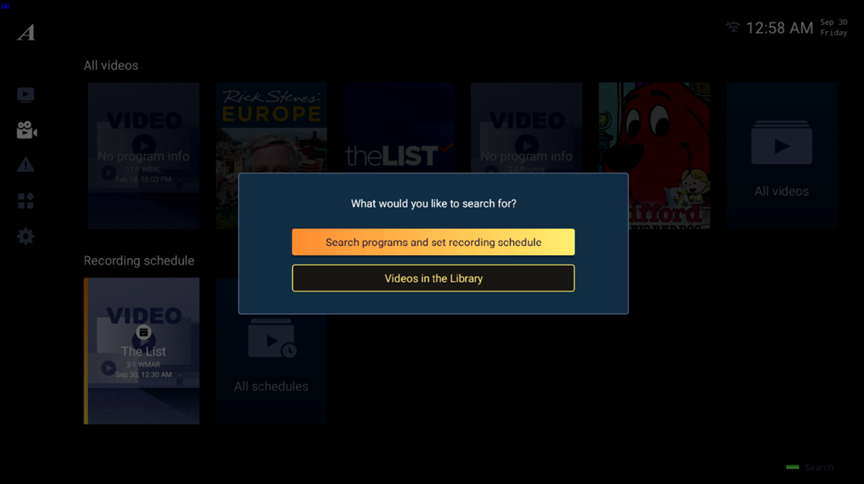
- Open the Library and press the Green Color Key to access the search function.
- Choose to search for programs to record or videos recorded.
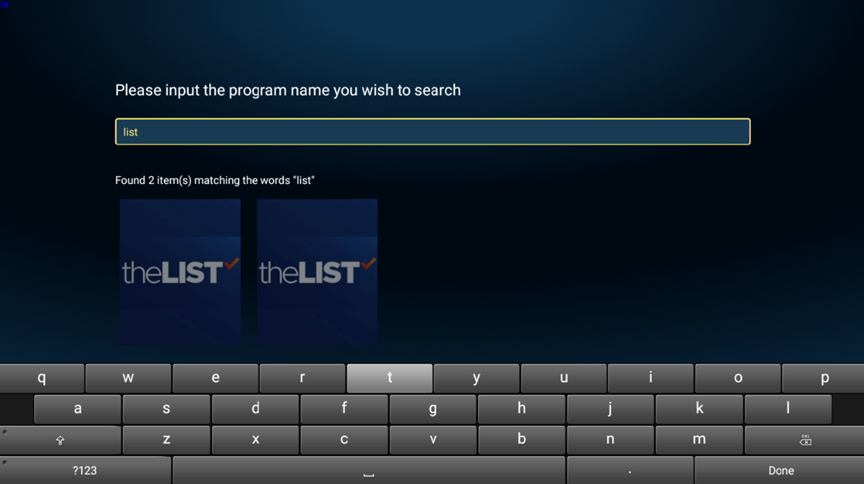
- Enter the program name in the search bar.
- Select a result to either schedule a new recording or play an existing recorded video.
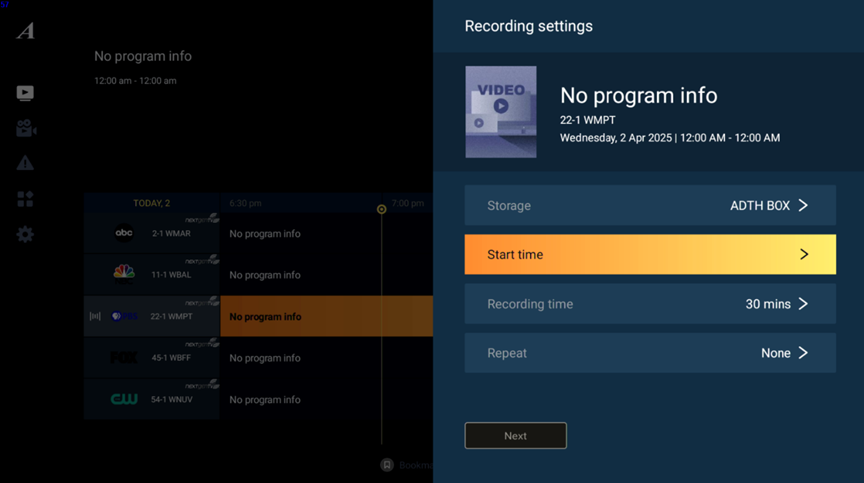
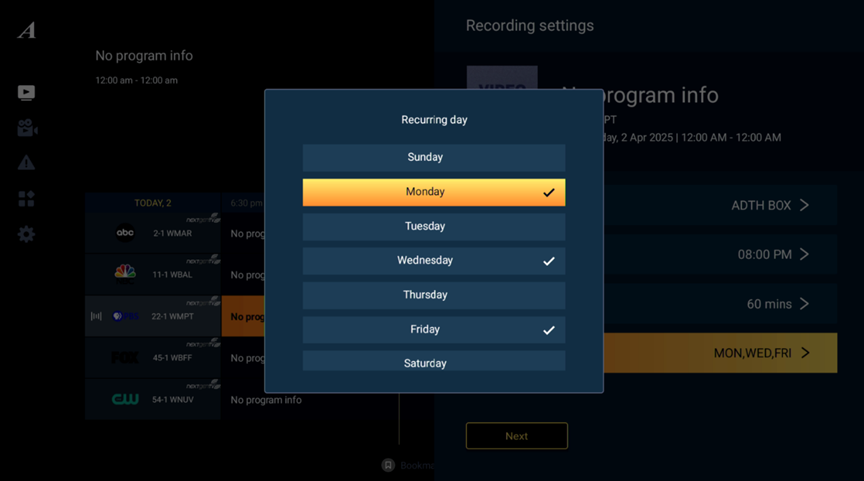
Manual Recording (When Program Guide Lacks Information)
- Select the desired channel and press the red Color Key.
- Manually set the start time and recording duration (30, 60, or 90 minutes).
- Choose whether to schedule and repeat future recordings at the same time on selected days (e.g., Monday, Wednesday, and Friday).
- You can rename the scheduled recording while saving.
Last reviewed: 7 August 2026.
Related articles
Was this article helpful?
That’s Great!
Thank you for your feedback
Sorry! We couldn't be helpful
Thank you for your feedback
Feedback sent
We appreciate your effort and will try to fix the article